Summary
I am a big fan of Peloton and frequently ride the bike. Unfortunately, I recently broke the buckle on my right Peloton shoe. This actually happened once before shortly after I purchased the shoes and, when I called Peloton customer service then, they immediately sent me the replacement part.
I was expecting a similar result when I called Peloton customer support again this time. However, this time I was told that because I have owned the shoes for more than one year, Peloton cannot send me the replacement part. And, Peloton will not even sell me the replacement part. Instead, they told me I have to purchase new shoes!

This was very disappointing since my shoes are totally fine, except for the broken buckle. While I am generally a big fan of Peloton, Peloton is being extraordinarily foolish and short-sighted by providing terrible customer service. I would have been happy to purchase the replacement buckle but, because Peloton would not sell it to me, I began searching online to buy it elsewhere.
Fortunately, as you will see below, it is easy to find the necessary replacement parts online for a fraction of the price of buying new shoes.
Background
The buckle that broke on the Peloton shoe is called either a Caliper Buckle or a Ratchet Buckle. As I stated, I first called Peloton and was disappointed they would not sell me the replacement part and that they tried to force me to buy new shoes. Undaunted, I began searching online.
First, I identified that Exustar, a Taiwan manufacturer of bicycle equipment, manufactures the Peloton shoes for Peloton. I contacted Exustar via email only to be frustrated again and to become even more disappointed in Peloton. Exustar informed me that without written approval from Peloton, they are contractually forbidden from selling me the necessary part. Because of these contractual restrictions, Exustar was unable to help me.
What do I do next? I considered a few options. First, I searched on Alibaba for a caliper buckle manufacturer. Second, I visited several bike shops and shoe repair shops in my neighborhood to see if any of them could help me. They could not! Third, since Exustar makes shoes that look almost identical to the Peloton shoe, I considered buying the necessary part from Exustar for a similar shoe and testing to see if that would work.
However, I didn’t have to pursue these alternate routes, since I then found a company online selling a Peloton-compatible buckle and strap. The m2 website explains that the company has over 25 years of experience specifically manufacturing buckles:
“m2® is a design, engineering, and production firm specializing in “m2®″ ratcheting buckles and straps.”
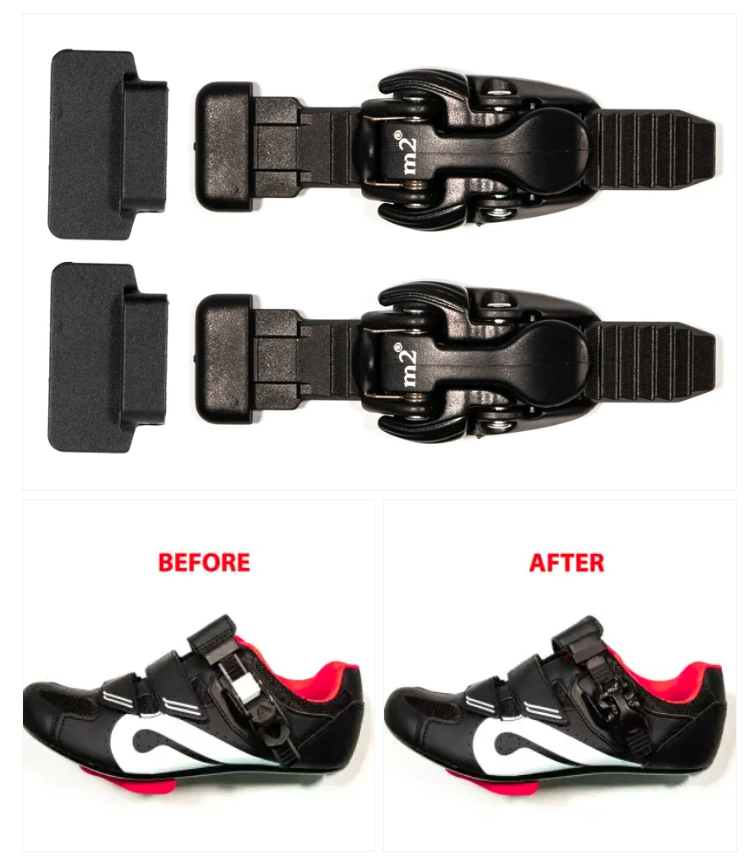
I then found this page on the m2 website selling exactly what I need:

The webpage explains that it is compatible with Peloton shoes. They are sold in a pair (one for each shoe) and they also come with the straps. Unfortunately, when replacing the buckle, the website states that strap also needs to be replaced (although, as explained below, my old strap worked just fine with the new buckle). However, as you will see below, it is extremely easy to replace the strap and only takes a few seconds. I quickly ordered them.
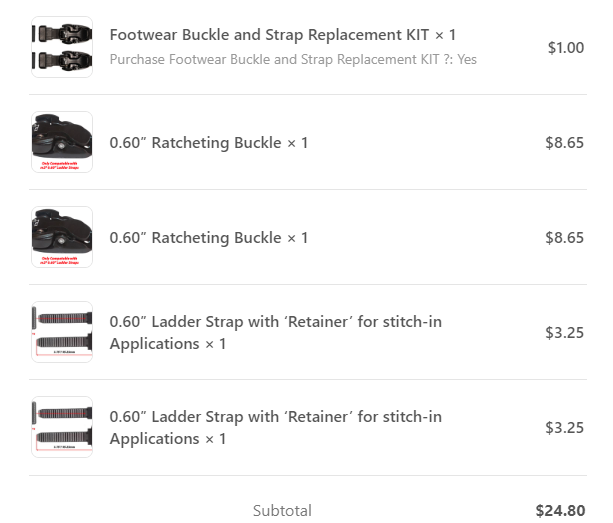
The price for the entire set costs $24.80, plus $10.30 for shipping to California, resulting in a grand total of $35.10.

I actually thought this was expensive for parts that probably cost very little to manufacture, but it was still significantly cheaper than then the $125 (plus tax and shipping) that Peloton charges for new shoes.
About a week later, my new buckles and straps arrived via the US Mail.
Installing the Replacement Peloton Shoe Buckle and Strap
I will now show you how easy it is to replace both the buckle and strap on the Peloton shoe.
Step 1 – Remove the Broken Buckle

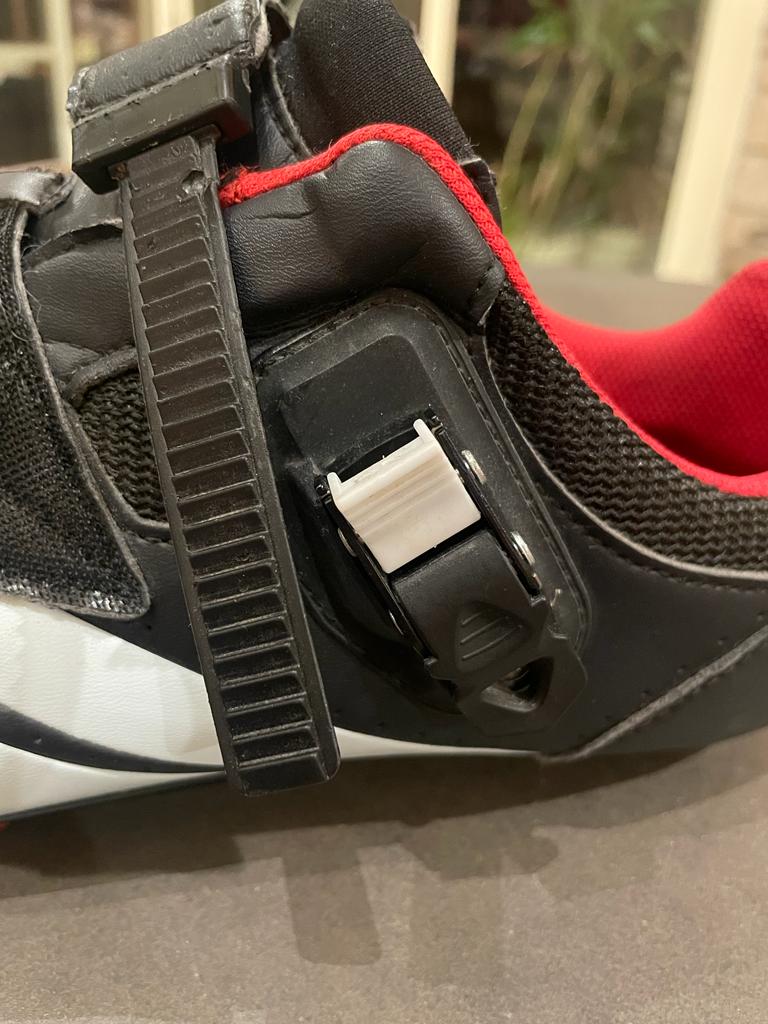
As you can see in this picture, there is a small screw that attaches the buckle to the shoe. Using a Phillips screwdriver, simply remove the screw and remove the buckle from the shoe.
Step 2 & 3 – Attaching the New Buckle
Attaching the new buckle is easy. The new strap comes attached to the buckle, so first, just remove the strap from the buckle (if your new strap doesn’t come attached to the buckle, you can skip this step). It actually took me a minute to figure out how to release the strap because I first was pushing the sides in. That is incorrect. Instead, just push the side tabs down and you can easily separate the strap from the buckle.
Using the same screw that held in place the broken buckle, simply screw your new buckle into the bottom hole in the shoe (there are two holes, so make sure to screw the buckle into the bottom hole). Make sure to tighten the screw so that the buckle is held in place.
Step 4 – Remove the Old Strap
While the old strap is perfectly fine and works with the new buckle (therefore, you may not need to replace the strap), I chose to replace the strap for two reasons. First, the new buckle and strap are designed to work together. Second, it takes just a couple of seconds to replace so I figured it would be nice to also have a new strap.

Do not pull the strap. Instead, while holding the base of the strap, push the strap away from the buckle and it will easily pop-out. Watch this video to see how easy it is:
Step 5 – Attach the New Strap
Simply attach the new strap by doing the opposite of what you did to remove the old strap. It easily slides through the base of the strap holder. I had to pull a bit hard while wiggling it back and forth to get the strap to become fully secured in place. Watch this video to see how easy it is:
That’s it. The new buckle and strap are now properly attached and ready to be used.
Step 6 – Test your new buckle and strap
Once you have your new buckle and strap installed on your shoe, try it out to get comfortable with the locking and unlocking mechanism. While not wearing the shoe, I was able to easily slide the strap through the buckle. While wearing the shoe, it took a bit getting used to as I slid the strap through the buckle and then lifted the latch in the middle of the buckle a couple of times to tighten it.
To remove the strap, simply push down on the two tabs on the sides of the buckle (push down towards the side of the shoe and not into the sides of the buckle) and you can easily separate the strap from the buckle. What this video to see how easy it is.
Final Words
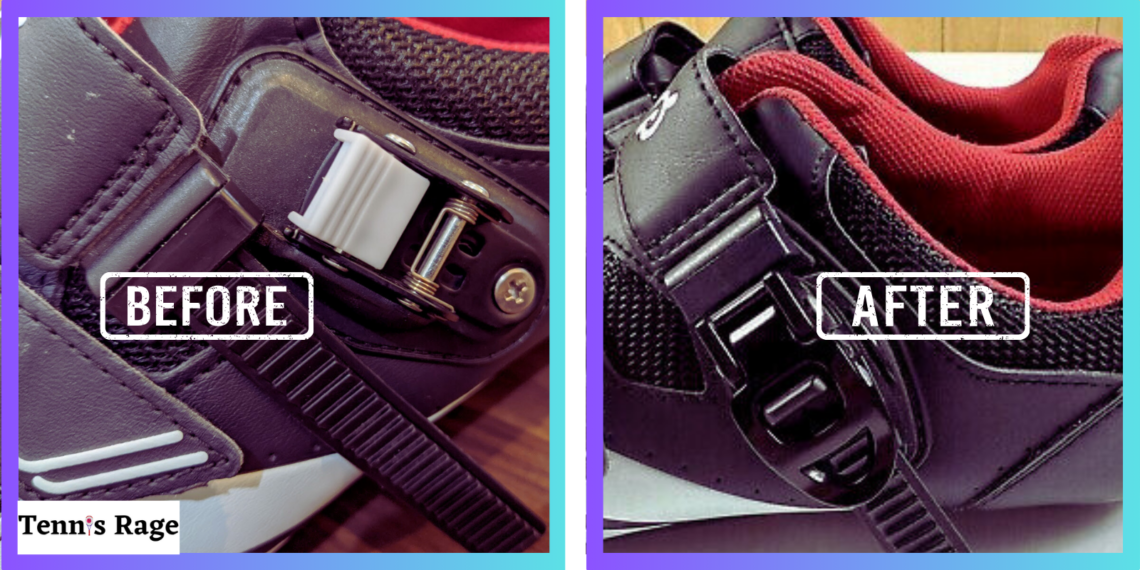
I have used my Peloton shoes with the new buckle and strap several times and I am happy with the quality of this buckle, although I still wish that Peloton would just sell this replacement part. It does take a bit of time getting used to fastening and unfastening the buckle.
Since I purchased a set of two buckles and straps, and it is so easy replace the old buckle and strap, I am considering swapping the buckle and strap on my other shoe to make them the same.
Again, you can purchase the Peloton shoe replacement buckle and strap by clicking on this link.


